Cloud Monitor allows your company to monitor and participate in conversations on the Social Networks, interacting with the customers through Facebook, Twitter and listening on YouTube, Blogs or other RSS Feeds. From the searches in the Cloud Monitor agents can create incidents to pro-actively communicate with customers and follow up customers’s issues and also identify trends or experiences.
Social Channels have to be set up in order for RightNow to be able to search the Social Networks for posts and comments related to your organization and its products/services. These channels include Facebook, Twitter, YouTube, and RSS feeds.
Facebook
RightNow CX provides a default Facebook channel that you can access through the social monitor to perform searches of Facebook’s public feed. In addition, you can add custom channels to focus your searches to specific Facebook pages. By adding a custom Facebook channel, you can perform cloud searches that are confined to the posts on your organization’s
Facebook page.
To add a custom Facebook channel:
1. Click the Configuration button on the navigation pane.
2. Double-click Channels under Service in the configuration list. The Channels tree displays.
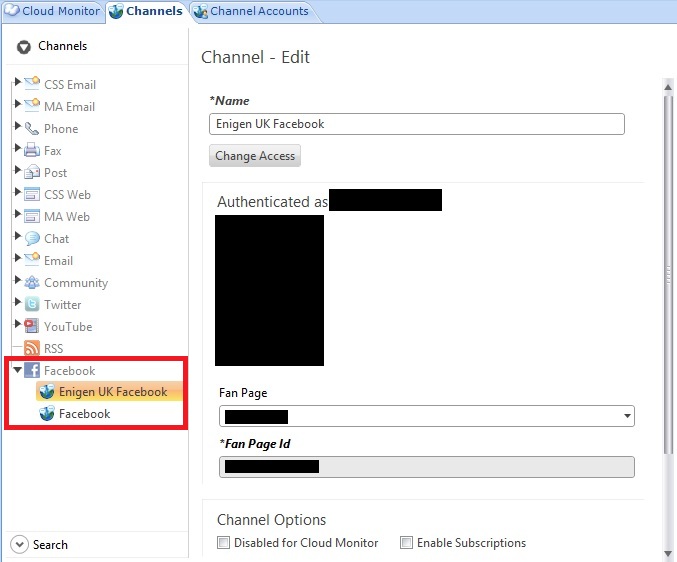
3. Click Facebook and then click the New button on the ribbon to display the editor.
4. Type a name for the custom channel in the Name field.
5. Click the Grant Access button. The Facebook Login window displays.
6. Type the email address and password for the Facebook account associated with the page.
7. Click the Log In button to sync the account with the channel you are creating.
8. Enter the necessary field information (Fan Page, Fan Page Id, etc).
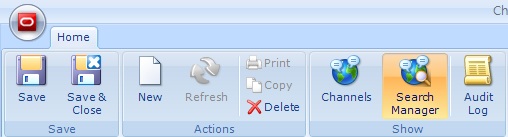
Note: Once the channel is saved and has been used to perform cloud searches, the Search Manager button on the Channels editor ribbon will become active. This function provides access to a utility for managing cloud searches by channel
If you want your staff to be able to interact with customers on Facebook, you can also define a channel account to permit specific staff members to monitor your Facebook pages and send responses (Note: when agents reply to Facebook posts, their replies appear to come from the fan page and not from individual persona).
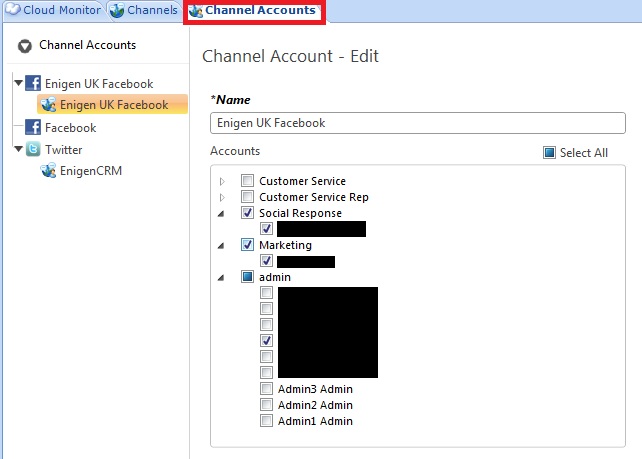
To provide staff access to a Facebook channel account:
1. Click the Configuration button on the navigation pane.
2. Double-click Channel Accounts under Service. The Channel Accounts tree display.
3. Click the arrow next to a Facebook custom channel to expand it and then click its contained channel account to display it on the editor.
4. Type a name for the Facebook channel account in the Name field
5. Select a group check box to associate all staff members in the group with the channel account or expand the group to select staff members individually.