RightNow August 2013 Released

Oracle has announced the availability of the RightNow August 2013 release, which brings many interesting and relevant improvements to the platform. The main aim is to continue the enhancement of the overall Customer Experience, and the most relevant developments are the integration with Oracle ATG Web Commerce and Oracle Policy Automation.

Contact Center Experience:

– The integration with Oracle ATG Web Commerce allows agents to offer assistance to customers that are buying online. By pro-actively or re-actively answering questions and supporting the buying process they can help customers to complete orders, thus reducing cart abandonment.

– The integration with Oracle Policy Automation (that is now part of the Oracle Service cloud) gives the ability for solving complex Incidents using the dynamic questionnaires within the Dynamic Agent Desktop while interacting directly with the Incident’s relevant and related data in the database.

– Date and date/time fields in Custom Objects now support dates from the 1st January 1902 (until now it was 1st January 1970). Also a minimum and maximum value can be set when power users are creating these fields in the object designer.
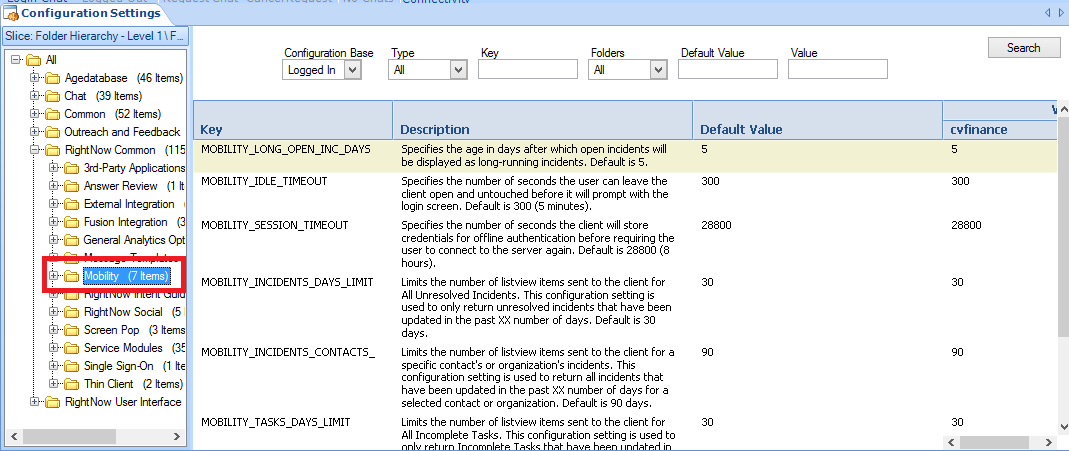
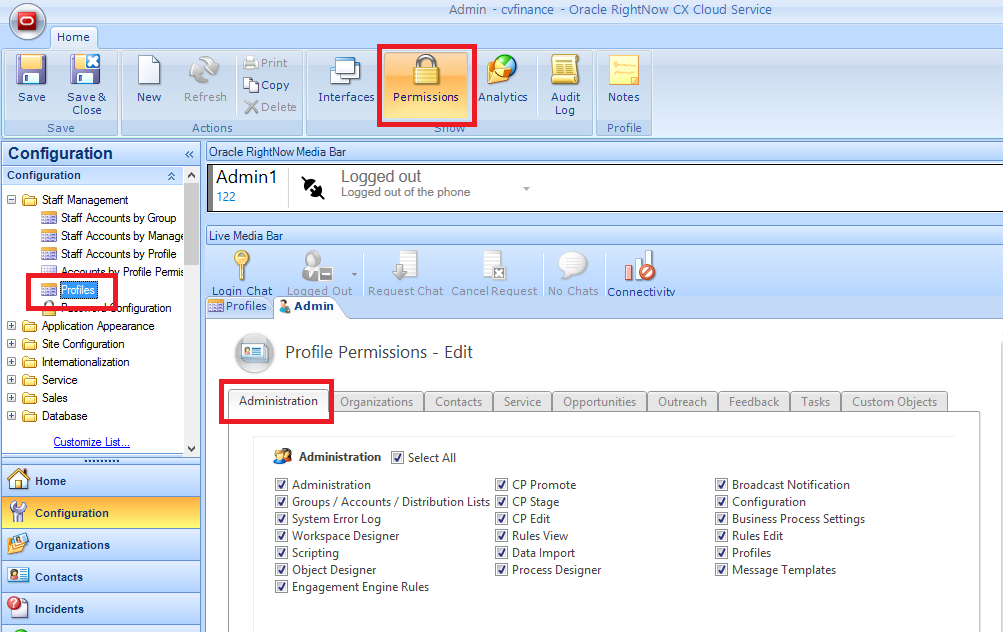
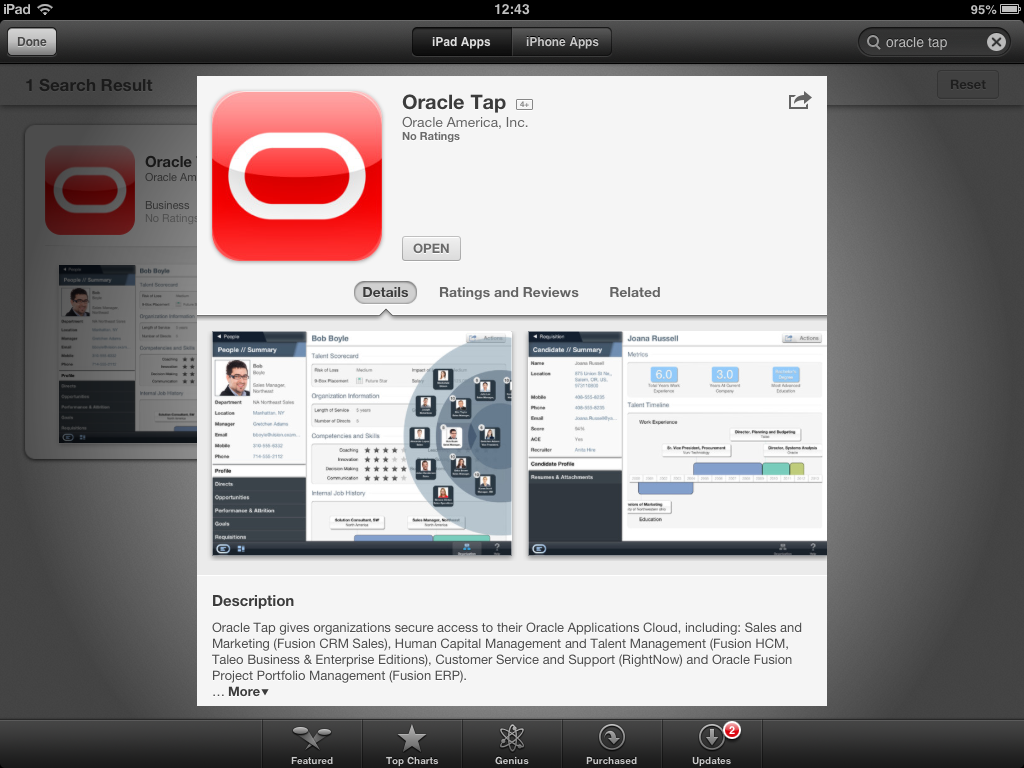
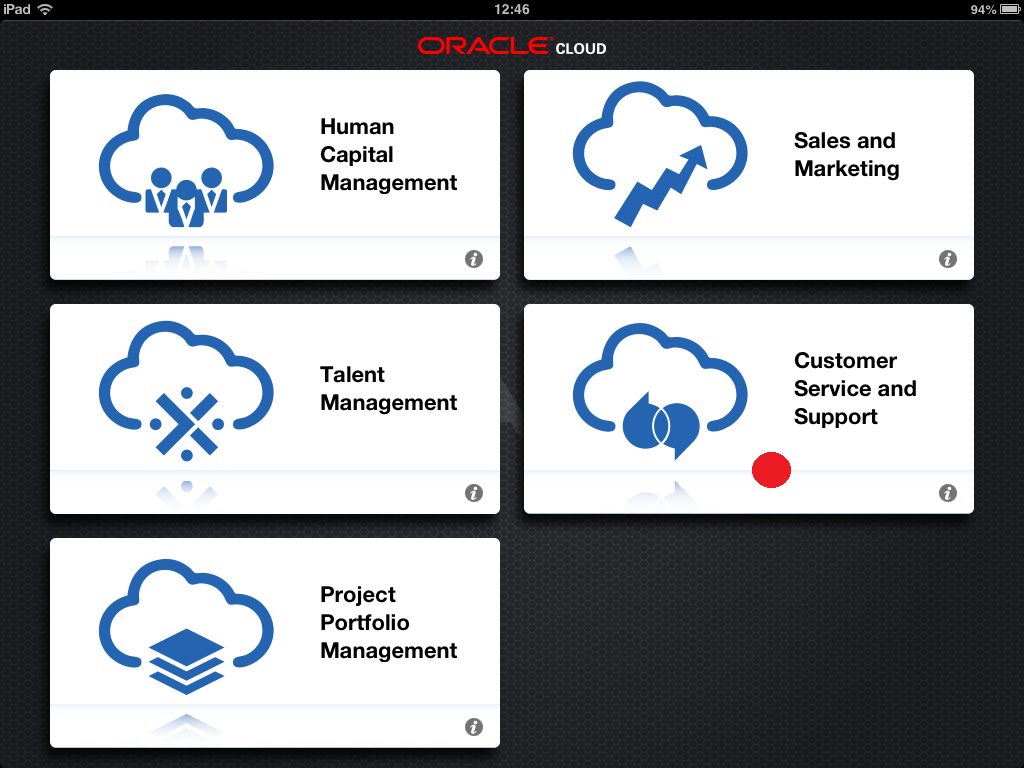
Mobile Agent app:

– Power users are now able to customise the Mobile App, namely the mobile Incident UI layout. They can add standard or custom fields for Incidents, Contacts or Organisations into certain areas of the Incident workspace (Summary, Additional Information, Contact Details).

– Another new feature for power users is the ability to reset staff members’ passwords and set Mobile Agent app permissions through the user’s Profile.

– Users are now able to perform a wider list of tasks from their mobile devices, such as send a message from an Incident to the primary contact, record and review Time Billed, or Filter open Incidents by Queue.

Feedback:

– New features that aim to increase the participation on Surveys will allow the placement of a syndicated survey link on the Customer Portal or any other pages. A new widget called SurveyLink is available in this version of the Customer Portal to address that.

SurveyLink widget

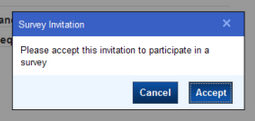
– Two other new widgets – ProactiveSurveyLink andSyndicated ProactiveSurveyLink – will give the ability to display/pop an invitation window to participate in a Survey.

ProactiveSurveyLink widget

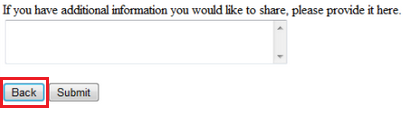
– To increase the completion and accuracy of the Surveys, a new Back button will allow customers to review or amend their previous answers before submitting the Survey.

SurveyBackButton

– Up to four automatic reminders can be configured to notify customers of forgotten or incomplete Surveys. Those notifications can include merged fields and have available the proof and preview functionalities.

Analytics:

– A new button named References will be available in the reports designer so that power users can easily see where the reports are being used. In which Workspaces, Navigation Set or Dashboard.

– A new report named Incoming Email Filter Details will help power users understand why emails are being filtered out or rejected by Techmail utility. It lists emails that were filtered out or rejected, and its details.

– Two new reports named Survey Reminder Statistics and Broadcast Response Timeline are now available to complement the new Survey reminder functionality.

– Power users can now display external images in Reports without having to store them in RightNow through the Images Explorer. This option is available configuring the column format options pointing to external locations for the image files.

AnalyticsColumnFormat

Web Experience:

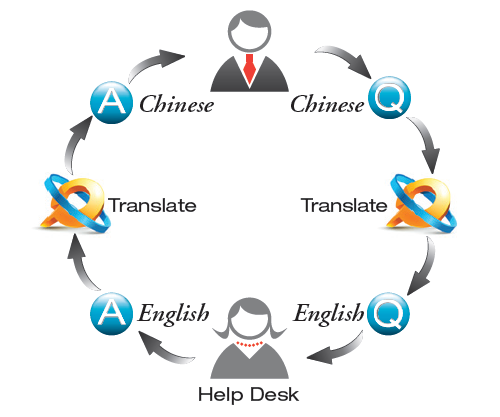
– Enhancements in the Knowledge Syndication widget (KnowledgeSyndication) will allow the delivery of Answers on pages external to your Customer Portal. The aim is again to reduce cart abandonment and improve conversion rates.

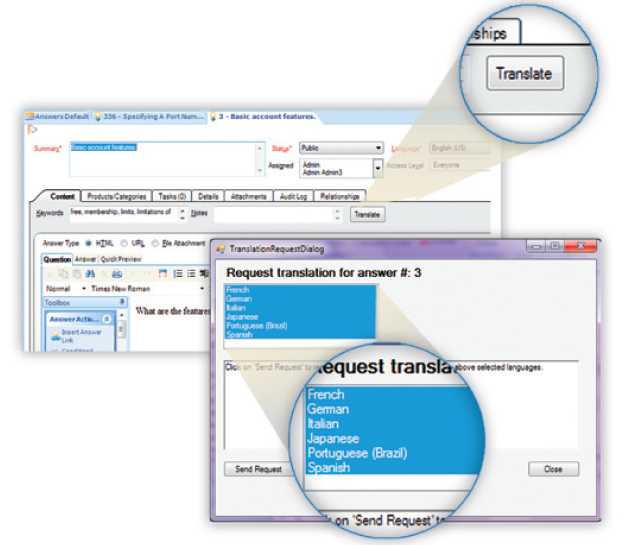
– The integration with Oracle Policy Automation allows power users to build interviews that can be placed anywhere and be accessed from any channel or device.

– The DateInput and BasicDateInput widgets will now support years back to 1902 for system attribute fields. The default value of the min_year attribute remains 1970, but it can be changed.

Social Experience:

– New Community moderation planning tools will allow Community managers to better do their jobs by resource planning and tracking their moderators. Independent groups functionality will allow B2B communities and provide greater control of community interactions.

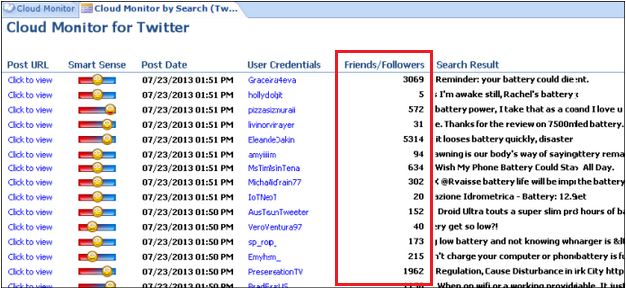
– Social Monitor improvements will allow enrichment of the customer’s social profile allowing the users to see information such as number of followers on Twitter, location and total number of posts, or number of friends on Facebook.

– That key customer profile information can also be captured and viewed in the Contact Workspace by adding the new Contact Social Profile report.

SocialMonitor

Knowledge Management:

– Improve the accuracy and relevancy of the Answers suggested by the SmartAssistant with the new AutoTuner. It leverages the machine learning, agent-specified best Answers, and implicit Answer / Incident linking information (prioritising Answers that have been appended to Incidents or have been identified as the Answer that best resolved an Incident).

Cloud Platform:

– Phase II of Custom Process Models brings improvements in the application performance as they enable existing processes to continue to run while waiting for an asynchronous response.

– Techmail utility has been enhanced and can now process email messages in parallel. The simultaneous processing of messages will increase the speed and the amount of messages processed, making the reply quicker.

Mobile Agent app: Customisation coming up!

Following the previous posts about the Mobile Agent app for RightNow CX – Oracle Tap Service and Support – here are some interesting news that will certainly please RightNow CX consultants and developers.

The August 2013 release will allow the customisation of the Incident workspace. Developers will be able to add standard or custom fields for Incidents, Contacts or Organisations into certain areas of the Incident workspace. Those areas are: the Summary section, the Additional Information section and the Contact Details section.

Planned for the November 2013 release, is the ability to create additional tabs and additional sections in the Incident workspace, to add standard or custom fields.

The ability to customise other mobile workspaces is not there yet. But Oracle is planning to provide that in 2014. Custom Objects and Contacts workspace will probably be the two priorities, which would make RightNow CX consultants and developers very happy.

Already available is the ability to customise the descriptive text strings seen in the mobile application via the Message Bases editor in the Dynamic Agent Desktop. Navigating to Configuration > Site Configuration > Message Bases.

Note that the Mobile Agent app main menu will display Incidents, Contacts, Organizations, or Tasks based on the Navigation Set and Profile of the logged in user.

Notice also that any change made via the Mobile Agent app will appear in the record’s Audit Log as has been done via mobile device.

Mobile Agent app: How to get started

Following the previous post about the Mobile Agent app for RightNow CX – Oracle Tap Service and Support – here are the steps on how to get started.

Step 1: Enable and configure the mobile agent app in the Configuration Settings.

Navigate to Configuration > Site Configuration > Configuration Settings > RightNow Common > Mobility.

mobile1

Step 2: Give your staff members permission to access the mobile agent app.

Navigate to Configuration > Staff Management > Profiles > (Open Profile) > PermissionsAdministration > (check the Account Authentication check box in the Mobile Agent App section)

mobile2

Step 3: Go to the Apple App Store, search for Oracle Tap app and install it.

photo

Step 4: Configure the Customer Service and Support cloud option on your iPad

Enter the URL to your Oracle RightNow CX application:
https:// <your virtual host> /cgi-bin/ <your interface> .cfg/php/tap/v1

image

image (1)

image (2)

Editing settings

Taping the Settings button on the main menu, a user can specify if login credentials are saved, how long the app will wait for a server response, if the data cache is cleared when the application is closed or restarted, and which server is used. Additionally, user can view the version and the license agreements.

Admins can specify the time periods used to initiate an automatic logout and to maintain offline authentication.

  • By default, the number of seconds the agent can leave the application idle before being logged out is 300 (5 minutes). To change this go to the MOBILITY_IDLE_TIMEOUT configuration setting.
  • By default, the number of seconds the application will store the agent’s credentials for offline authentication is 28800 (8 hours). To change this go to the MOBILITY_SESSION_TIMEOUT configuration setting.

Outreach and Marketing: Campaigns

RightNow Outreach provides a powerful solution for building and managing dynamic, multiple-step marketing campaigns.

The intuitive campaign designer, allows the creation of campaigns as a flow diagram. Admins can easily design a campaign by dragging and dropping components/elements from the toolbox to the canvas.

In addition, it is possible for Admins to define objectives and budgets for the campaigns, as well as estimate expenses and ROI.

Once the campaign is launched, Admins can review its results and compare them against the estimates to evaluate the effectiveness of the campaign.

To create a campaign:

Step 1: Click the Campaigns button on the navigation pane and double-click Campaigns Explorer.

Step 2: Click the New button to select a starting point for your new campaign.

  • Click Blank Campaign to open a new campaign with a blank design canvas
  • Click Choose Existing Campaign to create a new campaign by copying the design of an existing campaign
  • Click Choose a Campaign Template to create a new campaign by copying a campaign template

RNMKT1

Step 3: Click the Details button to manage campaign details, including assignment, start and end dates, and objectives.

RNMKT2Step 4: Click the Results button to view the campaign results (this report will display no data until the campaign has been launched).

Step 5: Click the Tasks button to add tasks to the campaign.

Step 6: Design the flow diagram of your campaign.

The flow diagram will be the graphical representation of the steps, actions and decisions the campaign will perform, and the order in which it will perform those.

Before starting the design, it is advisable that Admins know the elements available in the toolbox and consider how each of them will help accomplish the campaigns’ key objectives.

After inserting each element the Admin can double-click on it to open a window where attributes of that element can be edited or defined.

RNMKT3

To create a flow diagram perform the following three steps:

Step 6.1: Drag and drop the elements from the toolbox onto the canvas.

Event Triggering Elements: Serve as starting points for campaigns

  • Serve Web Page
  • Broadcast Mailing
  • Scheduled Entry Point
  • Entry Point

 Standard Elements: Perform actions when specified criteria are met.

  • Add to List
  • Transactional Mailing
  • Set Field
  • Opportunity
  • Notification
  • Transactional Survey
  • Redirect to URL
  • Lead
  • Incident
  • External Event

 Artifacts: Comments about the campaign. Do not affect the outcome of the flow diagram.

  • Comment

 Conditional Elements: Produce multiple path outcomes based on decisions.

  • Case Statement
  • Decision

Step 6.2: Connect one element to another. To do that just click an anchor on the first element and drag the connector to an anchor on the second element. The anchor is highlighted when the connector is able to link to it. The connector arrow will point from the first element to the second.

Connectors are components used to link elements and indicate flow direction. Elements can be connected to other elements depending on their type. The type of connectors are:

  • Yes (Green): links a decision element to another element. The path is taken if the contact meets the criteria specified in the decision.
  • No (Red): links a decision element to another element. The path is taken if the contact does not meet the criteria specified in the decision.
  • Standard (Gray): links one element to another element. The second action is performed immediately after the first
  • Artifact (Black, Dashed): links a comment to an element.
  • Submit (Blue): submits an element’s web form fields to the database and links to another element. A web form can be a document with a web form or survey questions
  • Case (Gray): links a case statement element to another element. The path is taken if the contact meets the criteria specified in the case statement.

 Each element can have a specific number of incoming and outgoing connectors.

Step 6.3 (Optional): Change the formatting of an element. Cut, copy, or paste one or more components. Export an image of the canvas to your workstation by clicking the CX button and selecting Export Image.

Self Service for Facebook: Configuration

To enable Self Service for Facebook, it is necessary to configure its settings in both Facebook and RightNow.

To enable RightNow Self Service for Facebook

1. In a web browser, go to http://facebook.com/developers

2. Log in using your Facebook account.

Note: The configuration of your Self Service for Facebook application is tied to the Facebook account used to configure it. For this reason, you should use an account that has been created specifically to administer the application. This can prevent problems if the staff member who configured the account transfers to another position or leaves your organization.

3. If prompted, click the Allow button to allow the Developer application permission to access your Facebook profile information.

Note: The Developer application is the property of Facebook and its use is subject to Facebook’s terms and conditions. Depending on the state of your Facebook account, you may be prompted to confirm your account information in order to add applications.

4. Click “Apps”.

5. Click the “+ Create New App” button.

6. Type a name for your application in the “App Name” field and click the “Continue” button.

7. Enter the confirmation text in the Security Check form and click the “Continue” button. The browser refreshes to display the basic settings of your application.

8. Click to expand the Website with Facebook Login, App on Facebook, and Page Tab sections, and enter the following information in the fields highlighted in the example screenshot below.

rnfb3

rnfb4

Namespace: Type the name for the Facebook canvas page that will display your application. We recommend using the following convention: rncx-<organization_name>

App Domains: Type the domain used in your site URL. This ensures that Facebook can authenticate to related subdomains. The domain used for RightNow CX sites is custhelp.com.

Site URL: Type the base URL for your Oracle RightNow CX site in the following format: http:// < your_rightnow_site >.custhelp.com/

Canvas URL: Type the URL for the Self Service for Facebook application in the following format: http:// < your_rightnow_site >.custhelp.com/cx/facebook/

Secure Canvas URL: Type the secure URL for the Self Service for Facebook application in the following format: https:// < your_rightnow_site >.custhelp.com/cx/facebook/

Page Tab Name: Type a label for the button or tab that customers will click on your Facebook page to display the Self Service for Facebook application.

Tip: Because Facebook displays only the first 16 characters of this value on the app button, we recommend using a simple name such as Customer Care. Since this button appears on your branded Facebook page, it is not necessary to add your brand name to the tab.

Page Tab URL: Type the application home page URL, in the following format: http:// < your_rightnow_site >.custhelp.com/cx/facebook/home/

Secure Page Tab URL: Type the application home page secure URL, in the following format: https:// < your_rightnow_site >.custhelp.com/cx/facebook/home/

Page Tab Width: If using Facebook’s Timeline layout, select Normal (810px).  If using Facebook’s legacy layout, select Narrow (520px).

9. Click the “Save Changes” button. Facebook begins propagating your Self Service for Facebook application across its servers and the page refreshes to display a summary of your application settings

Note: To edit these settings in the future, log in to http://www.facebook.com/developers, click “Apps”, click the application name under “Recently Viewed”, and click “Edit App”.

10. Write down the App ID and App Secret values that appear at the top of the page for later reference. You will enter these values in Oracle RightNow CX to authenticate Facebook and provide access to data from the knowledge base and community. Refer to the configuration steps below for how to configure the application in Oracle RightNow CX.

Note: Facebook may take several minutes to complete the processing of your application before it will be available at the canvas URL. However, the application will not be enabled until it has been configured in Oracle RightNow CX. Refer to the following procedure for configuring your application in Oracle RightNow CX.

To configure your application in Oracle RightNow CX

1. Log in to Oracle RightNow CX.

2. Click the “Configuration” button on the navigation pane.

3. Double-click “Configuration Settings” under “Site Configuration”.

4. Customize the following configuration settings.

a) Set FACEBOOK_ENABLED to Yes.

b) Set FACEBOOK_APPLICATION_ID to the App ID value of the Facebook application.

c) Set FACEBOOK_APPLICATION_SECRET to the App Secret value of the Facebook application.

Note: To obtain the App ID and App Secret values, refer to your notes from the end of the previous procedure or log into http://www.facebook.com/developers and click the application name.

5. To enable community features, edit the remaining FACEBOOK_* settings to enable the features you want Self Service for Facebook to provide.

Note: For information about any of these settings, click the setting and refer to the description that appears in the Configuration Editor, and consult the RightNow documentation.

6. Once enabled, the application is available at the canvas page:
http://apps.facebook.com/<Namespace>/

To add the application to your organization’s fan page

1. Navigate to the following URL:
http://www.facebook.com/dialog/pagetab?app_id=APP_ID&next=PAGE_TAB_URL
where the APP_ID and PAGE_TAB_URL can be found in the Facebook app development settings.

Example: http://www.facebook.com/dialog/pagetab?app_id=198170093600717&next=http://sitename.custhelp.com/cx/facebook/home/

2. Click the “Choose Facebook Pages” button and select the page you want to add your app to.

3. Click the “Add Page Tab” button. The application should now be accessible from your Facebook page.

Self Service for Facebook

In the age of the social web, organizations can no longer dictate when, where, and how they interact with customers. They must engage customers in their channels of choice. Facebook is without a doubt the most popular social network in the world, with over 1 billion active users.

RightNow Self Service for Facebook is a special Facebook application served by RightNow that provides access to features from Oracle RightNow CX Cloud Service right from a Facebook page, in both its standard and mobile web interfaces.

Using Self Service for Facebook, customers can:

  • Search the RightNow knowledge base, including results from community and natural language search using RightNow Intent Guide, if enabled.
  • Submit questions privately to the support team or publicly to the community.
  • Rate and comment on answers.
  • Browse community discussions.
  • Submit and track community posts and comments.
  • Share service and community experiences on Facebook.

Agents can field and respond to Facebook incidents right from the agent desktop. This way, customers can receive the same exceptional support they receive from other service channels without having to leave Facebook.

As a result, organizations can deliver a consistent experience to customers and fans on Facebook while maintaining a unified view of customer interactions across all service channels.

Features

Self Service for Facebook helps customers find the information they need by browsing or searching the knowledge base from the Facebook social networking site. Once connected, the “Find Answers” tab displayed in Facebook presents the same answers that are visible in the answer search report defined for the customer portal. The report will also include results from your community and Intent Guide, if enabled.

rnfb1

Similar to visiting the customer portal, customers can click an answer to view its contents, including guides, without leaving Facebook. They can also click the “Ask a Question” tab to submit questions. Incidents submitted in this manner are processed by the system just like incidents submitted through the customer portal, and can then be accessed by staff using the agent desktop.

rnfb2

Facebook accounts will be associated with existing contacts that share the same email address (whether primary or alternate). In a case where no matching contact is found, a new contact will be created and automatically associated using the email address from the Facebook account. Agent responses to incidents submitted through Facebook are sent by email to that address.

Customers can also click the “Your Support Account” tab to view and update incidents from their recent support history.

Incidents created through Self Service for Facebook will be processed through whatever business rules and escalation paths configured for the site. If a SmartAssistant rule is active, suggested answers will be displayed when questions are submitted, just as they are in the customer portal.

To route these incidents through a distinct set of rule actions, use “Incident.Channel equals Facebook” as a business rule condition.

Self Service for Facebook is a component of RightNow application that can be embedded in a Facebook fan page. It has three types of service:

  • Self-assisted Service: Customers can search and access the same answer content available in your knowledge base, and (when using RightNow Community) provide feedback on your content by commenting on and rating answers.
  • Crowd-assisted Service: Customers can share their service experiences with Facebook friends and search and participate in RightNow Community discussions.
  • Agent-assisted Service: Customers can submit questions to your Oracle RightNow CX application directly from your Facebook page, as well as view and update questions they have submitted.

Self Service for Facebook also provides single sign-on capabilities, allowing customers to link their RightNow contact records to their Facebook accounts. When enabled, customers can use Self Service for Facebook to log into their RightNow account using their Facebook account credentials.

Oracle SRM to improve Social capabilities

Research says that:

  • 1 in every 5 minutes online is spent in social networks
  • 58% of Facebook users liked a brand
  • 75% of users posted a negative comment after a poor experience
  • 39% of Twitter users tweeted about a brand

RightNow CX Social Experience enables brands to manage social interactions as a fully integrated part of the Customer Experience. It is designed to extend the Customer Experience to the places where consumers are learning, sharing, and buying across the social web. It provides services as:

  • Support and Innovation Communities
  • Self Service for Facebook
  • Social Monitor

The Communities are key for the Peer-to-Peer Support, which these days and for some companies are as important as Web Self-Service. The Self Service for Facebook is a brilliant part of the solution that allows access to RightNow’s Knowledge base and service capabilities directly from Facebook.

The Social Monitor (aka Cloud Monitor) allows companies to monitor and engage with customers in Social Media. Listening in channels like YouTube, Blogs or RSS Feeds, and even responding directly to customers through channels like Facebook or Twitter.

In this blog I already spoke a bit about how Social Monitor works, as you can see by clicking the “Social Experience” category

But the Social Media world is becoming bigger and bigger and for some companies (not all of them) the Social side is much more demanding. In this case, the RightNow CX Social Monitor can turn out to be insufficient. For those particular cases, there is the Oracle SRM suite.

Oracle SRM is a solution that has an out-of-the-box integration with RightNow CX, making it’s Social side even more powerful. It enables companies to use a single platform to Listen, Analyze, Monitor, Engage, Publish or Create content.

In the following video there is an Oracle SRM demonstration that will give a very good overview:

Notice, at 5 minutes 03 seconds, the “Send to RightNow” menu option when the presenter is showing the Engage module and replying to a customer post. By clicking this option, an incident is automatically created in RightNow CX to be managed by the customer service team.

osrm

Note: Oracle SRM suite comes from three acquisitions of best of breed social solutions: Collective Intellect, Vitrue and Involver.

LinguistNow for Incident/Answer translation

As a consultant I have the privilege of visiting a lot of companies, the pleasure of seeing how they work, and the challenge of trying to align their business needs with technology. Every company has its business-specific or industry-specific requirements but some of them are common.

Lately I came across an important requirement. Some companies have their support centres based in one country, but they serve many other countries all over the world. Therefore, their customer service teams need to have language skills/capabilities in order to better serve their customers.

RightNow CX is available in 30+ languages. If a company needs to provide support in different languages it can buy another RightNow Internal Interface and also another RightNow External Interface. But if many languages are needed it can be painful (or expensive) to manage so many interfaces.

A few months ago I came across Language I/O, an Oracle Gold Partner specialized in providing products for translation automation. Language I/O has two products that plug into RightNow CX and automate the translation of Incidents or Answers into 100+ languages.

  • LinguistNow Help: Automates high-quality, human translation of help and FAQ content (Answers), and also localizes links embedded within the content. This feature saves content editors days of manual link editing within the translated content.

lnh

  • LinguistNow Response: Enables English speaking customer service agents to respond to Incidents in any language. It is embedded in the RightNow Agent Desktop and leverages both rapid-turn-around human translation as well as machine translation.

lnr

The product seemed very good so I asked for a demo. Kaarina Kvaavik (Managing Partner) and Lucia Kash (Business Development Director) were kind enough to show it to me and I was really impressed with what I saw. LinguistNow seems to be a very mature product that can really bring added value.

It translates RightNow Answers and Incidents in two ways:

  • Translate (automatic translation)
  • Re-translate (professional human translation). [average of 35 min to have the translation]

For companies with this kind of needs, it is really worth to have a look at this product.